
As previously chronicled, we purchased a “new” home last March. It’s a great house, it had one previous owner, which he built himself in 1971. While it isn’t the oldest house, it is still a home with a lot of character. The previous owner did everything himself, from helping lay the foundation to burying the septic tank. So, you never know what you’re going to find when you peel off some wallpaper or remove an electrical socket. It is has been an experience to say the least. While there are certainly moments where I question what was I thinking getting involved in this (like that time I painted the entire ceiling in the family room, just so two days later a pipe in the ceiling could start leaking, requiring a giant hole cut into the ceiling to access the pipe) and I will admit, occasionally when I drive by one of those cookie-cutter neighborhoods, I do look and think, “Man, I bet that is an easy life!” At the end of the day, I don’t think I would have it any other way. I love the location of our house, the land and the landscaping – but in addition to all that, I do enjoy working on projects around the house, and the feeling of accomplishment that comes when things actually go well. Of course, sometimes these things don’t go well, and end up just creating more work for me, but in the end, I still feel pretty good about it.
One project on the verge of completion is the basement bedroom. Our basement is a blank slate, it’s totally unfinished other than a bathroom that is framed out, but it has just endless potential. After the birth of our son, we were suddenly in the need of a spare bedroom (our guests have to stay somewhere), so I set out to build one in the basement. I picked a corner in the basement, it’s near the future bathroom, applied drywall to two concrete walls, one exterior and one interior, painted drylock on the 3rd exterior concrete wall, and then built a fourth wall. The first thing I did was insulate the exterior wall, and then start installing studs while boxing out the window and a doorway. Then I put in the studs on the wall I had to build. Once all of the studs were up, I started on the electrical – I installed three electrical sockets and a switch with an overhead light. It amazes me how easy it is to install electrical sockets and switches. I used to be so intimidated by electrical work, and now, for the most part, I find it a piece of cake. Of course, there are those situations dealing with 3-ways and dimmers, where I get a little confused. But, outside of those, I feel pretty good about electrical work. As soon as the electrical was in place, I started dry-walling. What a mess. Drywalling is one area I need more practice with – I think I can see just about every seam in the room, unfortunately. But, I guess that’s part of the learning experience. Once the sanding was as good as it was going to be, I started painting (my second least favorite part of the project – I hate painting) – first painted the drywall, then painted the drylock on the concrete wall. The drylock is terrible – the stuff is super thick and gets horrible coverage, makes a giant mess, and then is difficult to clean up.
This is what we started with – as you can see, just a open space in the basement. The existing studs there are the beginnings of a bathroom, and on the other side of the camera here is the water heater, breaker boxes and an area for a future root cellar.

And here is what we’re working with now – we left the floor as his, but plan to polish it down the road. It’s not completely finished – I haven’t done anything with the ceiling yet, but I’m going to install a drop-ceiling (I’m still researching) and I need to add a piece of trim where the drywall meets the concrete.
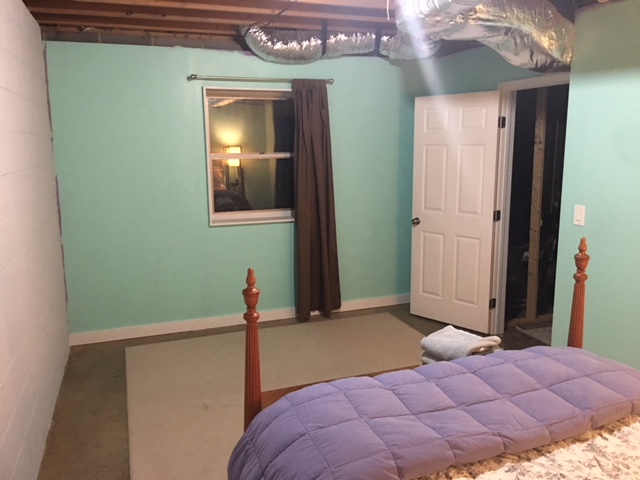
It’s not done, but we have had three different guests stay in the room, and they approve. It does get cold though…it is winter, and it’s in our basement. We give everyone a space heater, but the room doesn’t really hold heat since it’s just going to rise, and the ceiling is our kitchen floor. I plan to put a layer of insulation above the drop ceiling once it’s in place, so that will help. I also have a wood stove in the basement that we will eventually use, but we need to fix some cracks in the liner first.
So, that’s where things sit right now. I’ve started more pressing projects, but will eventually come back to this to add the trim and ceiling.
